
Wardriving is the act of finding WiFi networks, usually from a car or other vehicle, and mapping out their location. I did some similar work almost 3 years ago but this time around, there's been a few upgrades. Let's build some serious wardriving kit!
WiFi (in)security
My last wardriving session was back in November 2013 and I mapped out every single WiFi network in a small town to see how many there were and what type of security each of them used. Here are the results from 3 years ago:
That article, WiFi (in)Security - Is your network on the map and is it secure?, has all of the details but I was using a simple Android app called Wigle and my phone at the time, which was an old HTC if I recall correctly. The app basically uses the GPS on the phone to track your location and monitors for WiFi networks. When it finds one, it will store the location and details of the network to be extracted to Google Maps later. It's easy to setup, free if you already have a phone and pretty simple to do, but I wanted to step it up a notch. The WiFi on my phone, or any phone, is okay, but you can get much better WiFi equipment. I wanted to build a dedicated piece of hardware for the job.
New Hardware
Just like any good hardware project, this one started with a Raspberry Pi. If you haven't heard of a Raspberry Pi you should immediately go and check it out on their site and stop living under a rock! These things are awesome little pieces of kit and it's basically a fully fledged Linux PC that's the size of a credit card. It's got a 64bit 1.2GHz quad core CPU, 1GB RAM, WiFi, Bluetooth (+BLE), USB, Ethernet and a whole bunch of other stuff. The best part is, you can get a full kit for a little over £40.
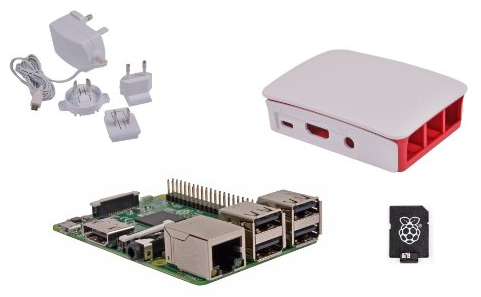
The next thing on my shopping list was a WiFi adapter. The Pi (version 3) does come with WiFi on board but I wanted something with an external antenna for better positioning. Anything WiFi and hacking related means Alfa. In my case, I grabbed an Alfa Network AWUS036NHA.

This connects up to the Pi with a mini-USB cable which means I can position it better and with an SMA connector you can change out the antenna for specific tasks if you need. The last item on my shopping list was GPS. The Pi doesn't come with GPS so we need a USB GPS receiver to be able to provide location data. For that I bought the GlobalSat BU-353-S4 for £28.

This will hook directly up to the Pi and provide GPS data for accurate positioning of the networks that we find. This was everything that I needed to purchase but you may need the odd micro or mini USB cable and power for the Pi. I was planning to run this from my car so my existing cigarette lighter USB port would be just fine, but you could also use a battery pack, just make sure it can output at least 5V 1A to run everything.
Setup
Now we have all of the hardware it's time to get it all setup and ready to go! First up is getting the OS installed on the Pi. Grab the latest version of Raspbian and a copy of Win32 Disk Imager too. This is the OS you will install on the Pi and the tool to write the file to the SD card. Unzip the image you downloaded, open Win32 Disk Imager, select the image file you just unzipped and from the device drop down menu select the SD card that you will be using for your Pi. Make sure you select the correct drive as you're about to format and overwrite it!
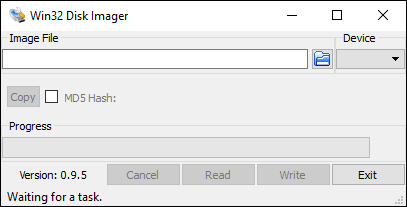
The process will take a few minutes to complete and then the SD card is ready for your Pi. Put the newly created SD card in your Pi and get ready to power it up. For the initial setup there are 2 ways you can approach it. You can either do it all remotely via SSH, like I'm going to, or you can connect a keyboard, mouse and HDMI monitor to do it directly on the device itself. Either approach is fine, I just did it remotely as it's easier than connecting a load of peripherals to the Pi. To SSH in to your Pi you can use any SSH client of your choosing but I use Putty if you need a recommendation. The only information you will need to know is the IP address of the Pi. Log in to your router control panel and find the details of active DHCP leases or the list of devices on your network. From here you should be able to find the IP address of your Pi and place that in the IP address field in Putty.
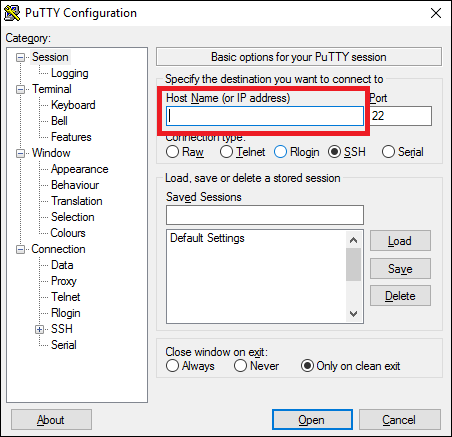
Once you've put the IP address of your Pi in, hit Open and accept the prompt that pops up.
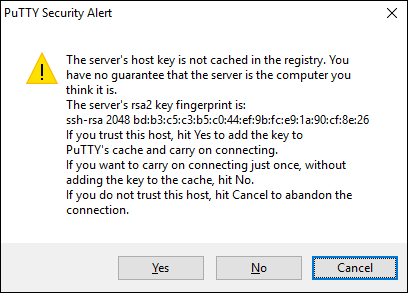
You will be asked for your username and password which are currently the defaults. Enter these and you should be logged in.
Username: pi
Password: raspberry
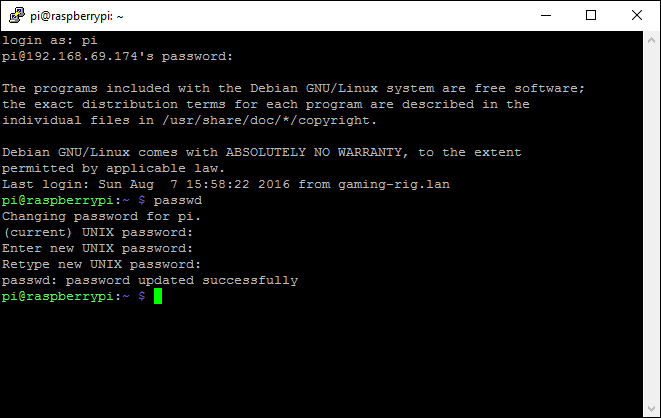
You should really change the default and to do that you need to issue the passwd command and follow the prompts, inserting your desired password.
Now that we're logged in we should update everything as the system could be a little bit behind on its updates. The following commands will check for and then install all outstanding updates.
sudo apt-get update
sudo apt-get upgrade -y
With that done, the Pi is now up to date and ready for us to start installing the software we need.
sudo apt-get install -y screen gpsd libncurses5-dev libpcap-dev tcpdump libnl-dev gpsd-clients python-gps
That command will install most of the software that we need and we have to configure gpsd once installed. Open the config file in an editor and paste the below configuration in.
sudo nano /etc/default/gpsd

START_DAEMON="true"
GPSD_OPTIONS="-n"
DEVICES="/dev/ttyUSB0"
USBAUTO="true"
GPSD_SOCKET="/var/run/gpsd.sock"
The only thing that you may need to change here is the DEVICES value. There's a good chance the GPS device is located in /dev/ttyUSB0 but it could be elsewhere. To double check, grab the following script and run it (source).
wget https://gist.githubusercontent.com/ScottHelme/e793516d2b322ed3a4c795a429eb5d04/raw/5829f33d29182aa92b79bcb7e76e71ab51c8fe1b/find.sh
chmod +x find.sh
./find.sh
This should give you some output.
pi@raspberrypi:~ $ ./find.sh
/dev/ttyUSB0 - Prolific_Technology_Inc._USB-Serial_Controller_D
You want to look for your GPS device and in my case I only have one device located at /dev/ttyUSB0 which is it. If your value is different then just update the path in the gpsd config file. Now, there is just one thing left to install, Kismet. Head over to their download page to get the link for the latest version. Look under Kismet releases and copy the download link, we're going to pass it to a command on the Pi now to download it there. Remember to replace the link in the first command with the one you just copied and you will also need to update the version number in subsequent commands if yours is different.
wget http://www.kismetwireless.net/code/kismet-2016-07-R1.tar.xz
tar -xvf kismet-2016-07-R1.tar.xz
cd kismet-2016-07-R1/
./configure
make dep
make
sudo make install
This will do everything that we need with Kismet which should now be installed and almost ready for use. If you want to avoid Kismet asking you which WiFi card to use every time it starts you can edit the config file and tell it which one to use. You can skip this step if you like. First of all, find the name of the WiFi card you want to use. If you're using the on board WiFi it is most likely wlan0 or if you're using an Alfa card like me, it will most likely be wlan1.
ifconfig
The ifconfig command will output information on your network interfaces and you can check that it is either wlan0 or wlan1 as you expect. If you're using an Alfa card you can check the MAC address which will be printed on the back against the ifconfig output. Next, add the value to the kismet config file.
sudo nano /usr/local/etc/kismet.conf
You need to find and edit theline of the config that contains # ncsource=wlan0. Remove the comment and edit the line with the appropriate value for your device.
ncsource=wlan1
We also need to change what data Kismet will output to log files as the default can result in some pretty big files containing data that we don't need for this project. Find the logtypes value, uncomment it if needed and cut it down from this:
logtypes=pcapdump,gpsxml,netxml,nettxt,alert
To this:
logtypes=gpsxml,netxml
With the change made, exit the editor and save the file and you're done with installing and configuring things!
Testing GPS
Before we start using everything it's a good idea to test it out. For the GPS this is really easy and all you need to do is make sure your GPS receiver has a clear view of the sky. I ran a network cable over to my window and plugged the Pi in on the windowsill so I could place the GPS receiver in clear view of the sky. The specific GPS receiver I got has a status LED on it that is solid when it has no GPS fix and blinks when it has a GPS fix. This isn't the most reliable testing in the world though so we're going to check it from the command line too. Use the following command:
cgps
This will start a test client for gpsd and connect to the service. It may take a few minutes to get a fix, and remember to make sure your antenna is in a good location, but it should look like this.
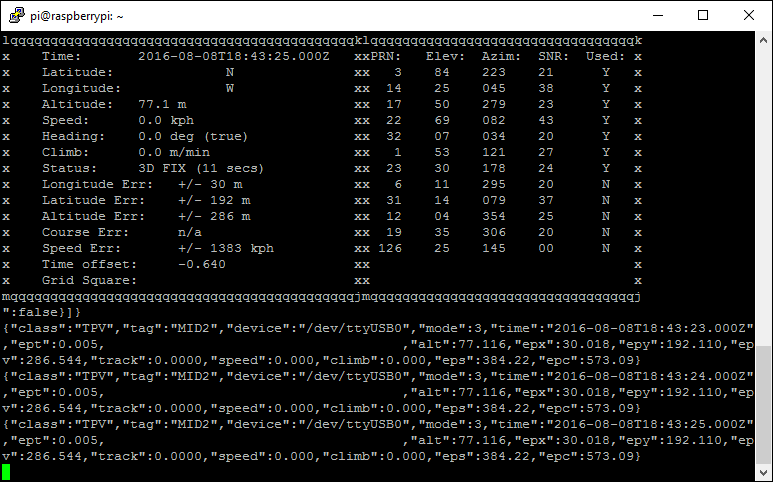
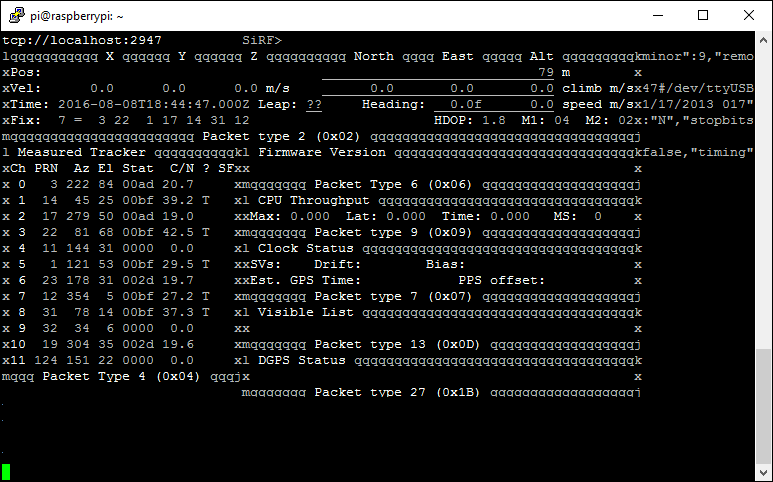
I've redacted my location here but you can take the latitude and longitude and paste them straight into Google Maps to make sure the location is accurate. If it's not, just give it a minute or so to 'settle down' and get a more accurate fix. You can also use gpsmon to test it out:
gpsmon
This is similar to cgps and just monitors the packets coming from the GPS device and outputs information. Again, I've redacted my location values.
If you're GPS is up and running then you can continue. If you're having problems getting a lock you may need to put the antenna in a better location and for anything else, try the old faithful and restart the gpsd service.
sudo service gpsd restart
Set A Static IP
At present the Pi will get its IP address from the DHCP server on the network it is connected to. This is fine when it's connected to a network but if you want connect to it in the field, say from your laptop, then it will be a problem as the Pi won't have an IP address. To seamlessly transition between these two situations, I created a static DHCP lease on my home router for the Pi and then manually assigned the same static IP on the Pi. This way, when it's at home or I'm connecting directly to it in the field, I will know what the IP address for the Pi is and I can access it.
sudo nano /etc/dhcpcd.conf

interface eth0
static ip_address=192.168.1.5/24
static routers=192.168.1.1
static domain_name_servers=192.168.1.1
Edit the dhcpd config file and paste the new config in at the bottom, remembering to update the values for your own network! Once done, reboot the Pi and make sure you can still connect.
sudo reboot
Trial Run
That's enough of configuring and setting stuff up, let's turn this thing on! Kismet dumps all of its data into files in the directory that you start it from, so to keep things sane let's create a new directory.
mkdir ~/testrun
cd ~/testrun
This directory will now contain all of our output files and we can fire up Kismet from here.
sudo kismet
When kismet starts click yes on the prompt to auto start Kismet Server and deselect the option to Show Console on the second prompt and click Start.

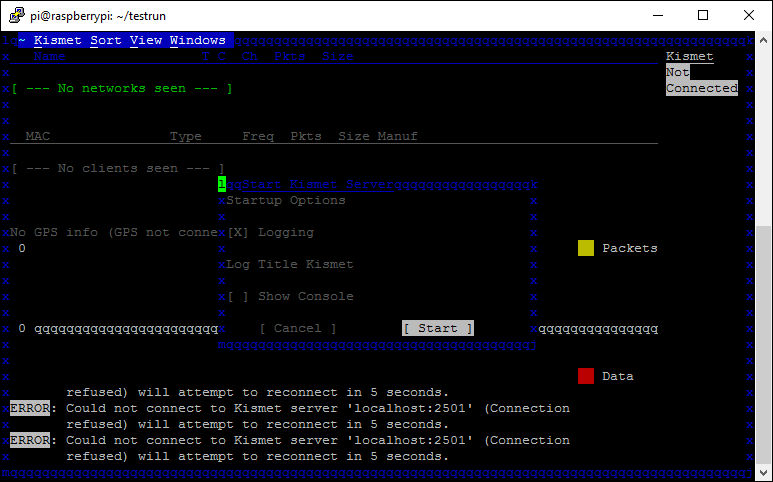
Kismet will start and after a few seconds you should see a screen that looks like this.
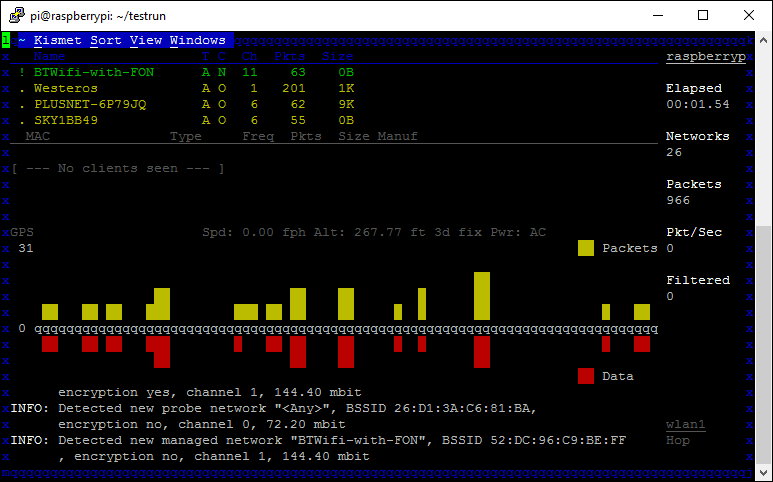
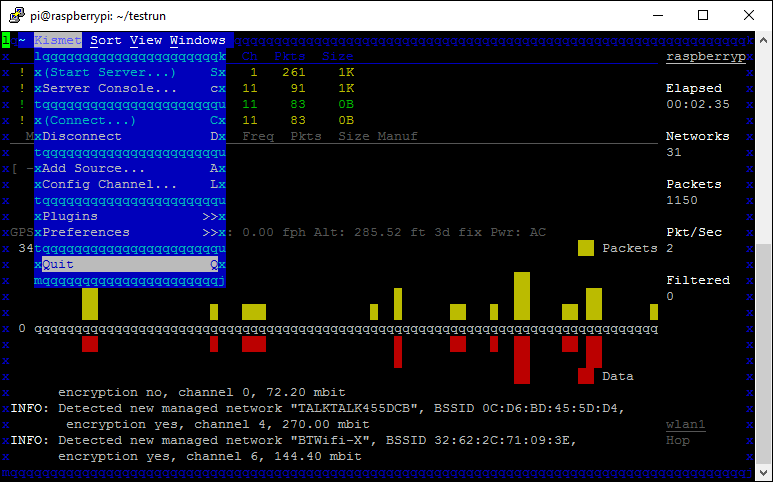
Kismet is now up and running and capturing data! In the centre of the screen you can see the GPS information (I've removed my coordinates) and you want to make sure that you can see yours and that is says '3d fix' so you know your GPS has a lock. In the right hand column you can see the number of networks observed, wait for a few to be listed so we have some test data to work with and then click the Kismet menu and Quit and Kill the server when prompted.
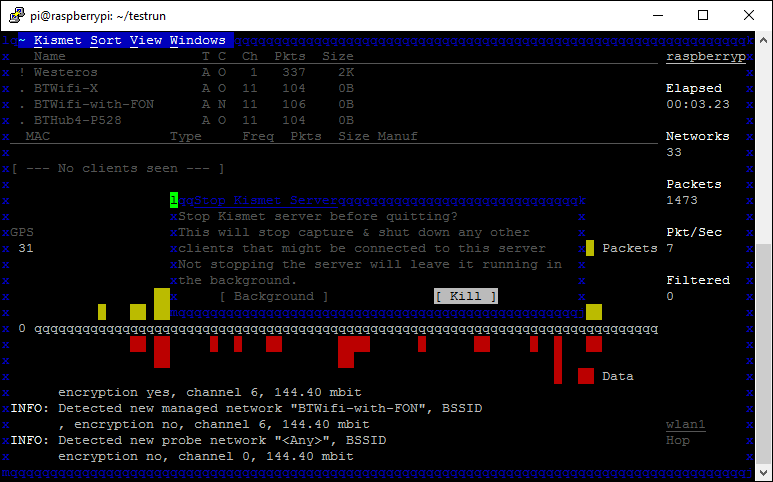
Once Kismet has closed, all of the data will be written into files in the current directory. Run the ls command and you should have 2 XML files, the ones we configured Kismet to output earlier in the setup section.
ls

Kismet-20160808-21-40-31-1.gpsxml
Kismet-20160808-21-40-31-1.netxml
Now we have the raw data, we need to do something useful with it.
Exporting To Google Maps
From all of our hard work we want is a pretty Google Map to look at with all of the WiFi networks that we found placed on it, so let's make it happen. We need to grab a script called netxml2kml that will prepare the raw data for upload to Google Maps.
wget https://gist.githubusercontent.com/ScottHelme/5c6869e17c3e9c8b2034dc8fc13e180b/raw/31c2d34f66748b6bd26415fd7d120c06b3d92eaf/netxml2kml.py -O netxml2kml.py
Pass the script our raw data and it will output a KML file ready for upload to Google Maps.
python netxml2kml.py --kml -o output *xml

Parser: Kismet-20160808-21-40-31-1.gpsxml, 0 new, 0 old
Parser: Kismet-20160808-21-40-31-1.netxml, 38 new, 0 old
Outputfile: output.*

KML export...
WPA     24
WEP     0
None    8
Other   6
Done. 38 networks
The output.kml file is now ready for upload to Google Maps and it's worth nothing that this can take a while depending on how many networks you found. Copy the file off the Pi using your preferred method, I use WinSCP, and save it somewhere locally. This link should create a new map for you on Google Maps to upload the KML file to, but if it doesn't it's easy enough to create a new one. Just go to Google Maps and click 'Create A New Map'.

Phew! It took us a few steps to get here but we're now done and you should be able to see the data you collected on the map. Of course, the Pi didn't move during all of this, so you probably have just a little cluster of networks, but all that will change once you get the Pi moving. All we have to do now is get our Pi mobile.
Wardriving Time!
This is where the real fun begins. The biggest limitation you will have to overcome here is power. You can run the Pi and it's accessories off a battery pack (power bank), the same you'd use to charge your phone, or the preferred method is from a powered USB port in a car. The Pi takes power from a micro-USB connector so any car charger or cigarette socket adapter will do. If you do go down the battery route then it has to be able to output at least 5v 1A and have a sufficient capacity to power the Pi and accessories for a few hours, or as long as you want to wardrive for. I created both so I can wardrive in the car or a 'handheld' solution with a battery pack. Here is my portable solution:
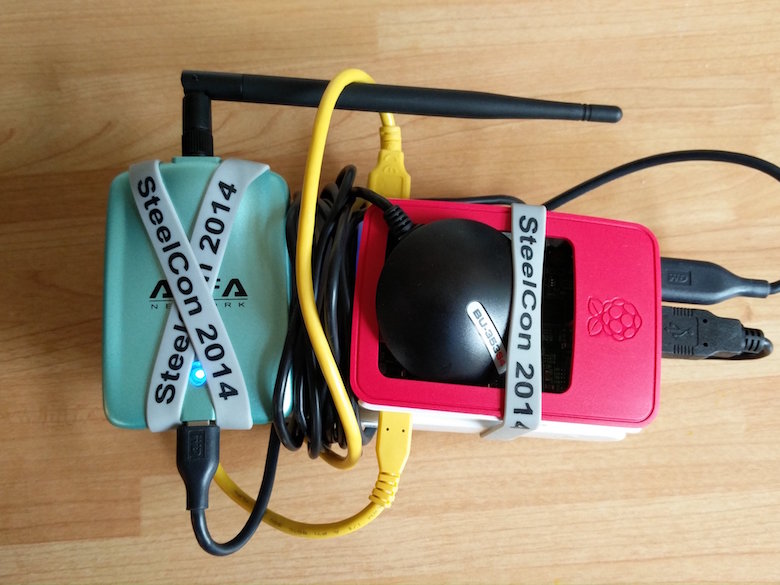
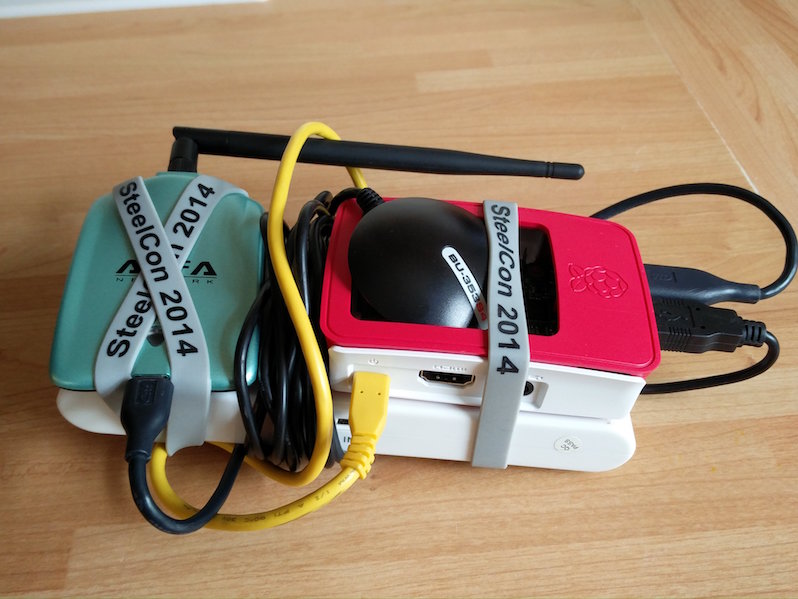
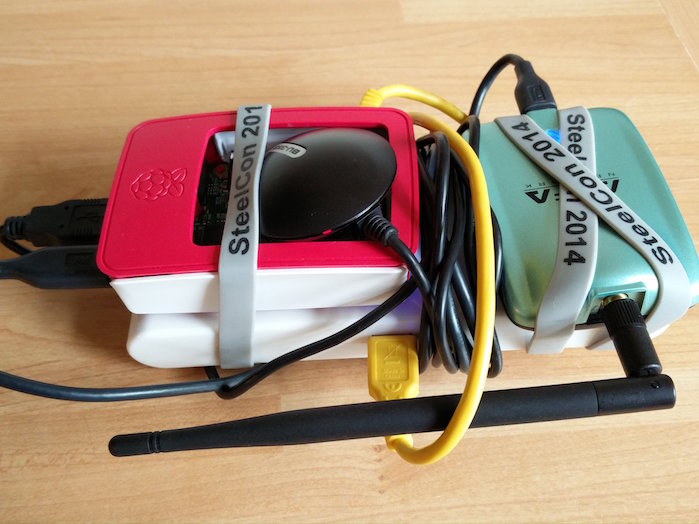
At the bottom of this stack I have a 50,000mAh battery which should be more than enough for a full day of wardriving with the Pi and associated accessories. More importantly, this battery pack has two outputs for providing power, one of them is 5v 1A, which is enough to run the Pi, but the other is 5v 2.1A which will make sure there are definitely no power shortages. On top of that the rest is fairly apparent. I have my Raspberry Pi 3, my Alfa WiFi module and the GPS module all neatly bound together with a few wristbands I got a couple of years back at SteelCon! To run this in a car all you need to do is remove the battery pack from the picture and connect the Pi directly to a power source in the car. When you're ready to take this out and about you will need to fire up Kismet, but as soon as you disconnect your SSH session, it's going to kill Kismet, so we need to use Screen. Screen is basically a way of having multiple shell windows open with different programs running on each one. You can attach and detach from them to view them or interact with whatever program is running, but crucially, if you disconnect from your SSH session, Screen sessions will keep running, which is exactly what we want on the Pi. When you want to go out wardriving, or warwalking/warbiking/wardroning/warwhateverring just start Kismet in a new screen session. To start a new Screen session called kismet:
screen -S kismet
This will open your new session and attach you to it. Start Kismet as you would before.
sudo kismet
Once it's running you can detach from the session using:
CTRL+A
D
Ctrl+A tells Screen we are about to send it a command and D is the detach command. You should see [detached] appear on the console. To see that your Screen session is running just ask Screen to list all sessions.
screen -ls

There is a screen on:
4121.kismet	(Detached)
1 Socket in /var/folders/6m/xpnz0lp176n2mn/T/.screen.
Reconnecting to a Screen session is simple too. You can do it with the ID, 4121 in the above example, or by name, like so.
screen -r kismet
This will attach you to the session and you will see that Kismet is still happily running. This is how you can start Kismet and then disconnect the Pi from your laptop to take with you. Just set it up and as long as you keep it powered, it will all keep going. You can now run it for as long as you like, or until your battery runs out, and then export the data later using the process above.
The Results
This blog is already pretty lengthy so I'm going to save writing up my results for another post. I will also include some more details on the setup in my car and how I mounted the GPS and WiFi antenna for the best performance. Needless to say the data is pretty interesting and flying around a town on Google Maps with all of the WiFi networks pinned is quite a sight.
If you have any questions, comments or feedback then please drop them in the comments below. If you've done something similar or create your own wardriving setup then please let me know and post some pictures with details. It'd be great to see how I might improve mine.